
So You Want Colorful Hair — Without the Regret
Let’s be honest. We’ve all sat in a waiting room, scrolled through Pinterest, and thought: “What if I went teal?”
Then immediately thought: “But what if I hate it?”
That’s exactly where temporary hair dye comes in. It gives you the fun without the funeral (for your natural hair color). You get to experiment, show up to a birthday party looking like a sunset, and wash the whole thing out by Sunday morning.
But here’s the thing — most people don’t apply it correctly, which is why they end up with patchy, faded, or stained results. This guide fixes that.
What Is Temporary Hair Dye, Really?
Before jumping into the how, it helps to understand the what.
Temporary hair color works by coating the hair shaft rather than penetrating it like permanent dyes. This means the color washes out easily, typically within one to a few shampoos, depending on the product and your hair type.
That’s the key difference. Permanent dyes go inside the hair strand. Temporary dye just sits on the outside — like a colorful jacket your hair puts on and takes off.
Temporary hair color sits entirely on the hair’s surface and washes out completely with shampooing, usually within 1–3 washes. This option is perfect for one-day events, Halloween costumes, experimenting with bold colors, or for those who aren’t ready for a permanent change.
Source: Sally Beauty
Types of Temporary Hair Dye: Which One Is Right for You?
Not all temporary dyes work the same way. Picking the right type matters more than most people realize.
1. Hair Chalk
Hair chalk comes in stick or powder form. Simply apply it to dry hair, sealing with heat if desired. However, hair chalk can be drying and may transfer onto clothing. It’s best suited for light to medium hair colors, as it may not show up well on very dark hair.
Source: Necole Bitchie
Great for: Highlights, streaks, festivals, and spontaneous decisions at 11 PM.
2. Hair Color Sprays
Hair color sprays provide a quick and convenient way to add color to specific sections or your entire head. They tend to be less vibrant than other options but wash out easily. Hair color sprays can sometimes be sticky or leave a residue.
Great for: All-over coverage, events, and anyone who likes the speed of a spray can.
3. Hair Makeup (Cream or Gel)
Similar to face makeup, hair makeup comes in cream or gel form and is applied directly to the hair. It offers vibrant color payoff and can be layered for more intense results.
Great for: Precision styling, bold looks, and people who enjoy the ritual of getting ready.
4. Colored Hair Wax
Most temporary hair color wax products last until your next shampoo. Colored hair wax is designed to be short-lived, bold, and washable.
Source: Kwan Yee Gor
Great for: Anyone who wants color AND hold in one product. Efficient and practical.

Does Your Natural Hair Color Matter?
Yes — more than most tutorials admit.
The intensity of the color and how well it shows up depends on your hair’s natural color and porosity. Lighter hair will generally showcase temporary colors more vividly, while darker hair may require bolder shades or multiple applications.
If you have dark hair and want to see vibrant results from a temporary dye, choose a product specifically designed for dark hair — or look for extra-pigmented formulas. Going in with a standard pastel chalk on black hair and expecting pink? That’s optimism, not a beauty strategy.
Before You Start: Do a Patch Test
This step saves you from rashes, swelling, and a very bad Tuesday.
Allergic reactions to hair dye are often caused by paraphenylenediamine (PPD), a chemical found in many dark-colored dyes. Symptoms can range from mild skin irritation to severe anaphylaxis. To minimize the risk, always perform a patch test before using a new hair dye.
Source: Healthline
How to do it: Apply a small amount of the dye behind your ear or on the inner elbow. Leave it uncovered for 24–48 hours. If you notice redness, itching, or swelling — stop immediately and choose a different product.
Even if a product is PPD-free, some people develop allergies to different color dyes throughout their lives. For that reason, always perform a patch test.
Source: Manic Panic
What You Need Before You Start
Get these ready before you open anything:
- Your chosen temporary dye (chalk, spray, wax, or gel)
- A fine-toothed comb and hairbrush
- Hair clips or bobby pins
- Disposable gloves
- A towel you don’t mind staining
- Petroleum jelly (Vaseline) for your hairline and ears
- A timer
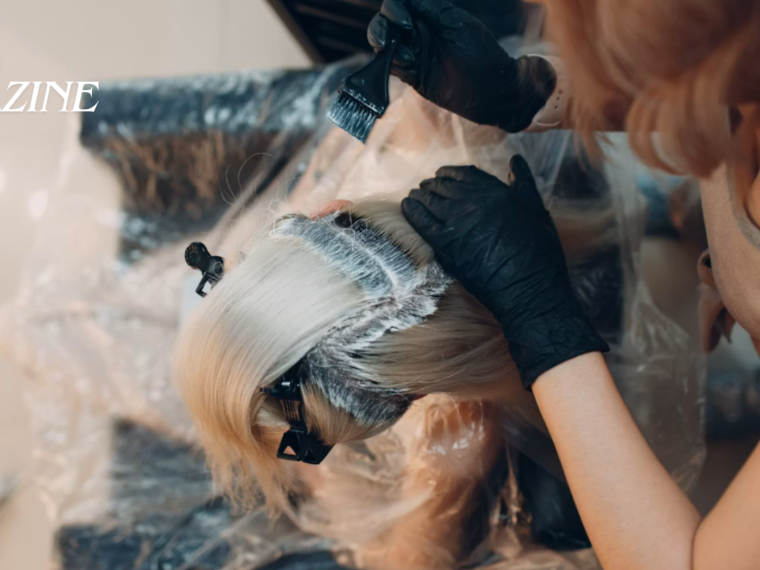
Before applying the wash-out hair dye, it’s a good idea to part and clip your hair into sections. This helps you control the application process and ensures even coverage. Brush your hair to remove any knots or tangles, then use a fine-toothed comb to part your hair into sections guided by your desired placement.
Source: L’Oréal Paris
Don’t skip the Vaseline on your skin. It creates a barrier so the dye doesn’t stain your forehead. Nobody wants a purple forehead on Monday morning.
How to Apply Temporary Hair Dye: Step by Step
Here’s the full process, in order. Follow this and you’ll avoid 90% of common mistakes.
Step 1: Prep Your Hair
Start with dry, detangled hair. Brush it out completely.
For the best at-home hair dye results, start with unwashed dry hair that you’ve detangled with a wide-toothed comb.
Source: Garnier
If you’re using hair chalk specifically, slightly damp hair can help the pigment grip better. But for sprays and waxes, dry hair works best.
Step 2: Protect Your Skin and Clothes
Apply petroleum jelly along your hairline, ears, and the back of your neck.
Drape a dark towel over your shoulders. Put on your gloves. Lay down newspaper or an old sheet if you’re working somewhere that stains easily.
Wrap a towel around the neck, tuck it under the shirt, and secure it with a clip over the chest. Wear a waterproof cape over the towel to prevent stains from setting on the clothes and skin.
Source: Ogle School
Step 3: Section Your Hair
Divide your hair into clean sections using clips. This is the step most people skip — and then wonder why their color looks uneven.
Work in small sections (about 1–2 inches wide). The more precise you are here, the more even your final result will be.
Step 4: Apply the Dye
This step varies slightly depending on your product type:
For hair chalk: Rub the chalk stick directly along the hair strand from root to tip. Use slow, even strokes. Spray each section of your hair with water to help the color adhere to the strands. Using a flat iron over colored strands can provide longer-lasting color. Source: Softer Hair
For hair spray: Hold the can 6–8 inches from your hair and spray in short, controlled bursts. Build up color gradually rather than saturating all at once.
For hair wax or gel: Scoop a small amount onto your fingertips or a brush and work it into the hair section from root to tip. Layer for deeper color.
For all types — work from the roots toward the ends and make sure every strand in the section is covered before moving to the next one.
Step 5: Let It Process (If Required)
Some products, especially gels and semi-permanent formulas, need processing time.
Once you have finished wrapping each section into a bun, leave in the dye for 60 minutes or the recommended time per the instructions.
Always read the label. Processing time varies by brand and product type. Rushing this step means weaker, patchier color.
Step 6: Rinse and Condition
Rinse the hair thoroughly until all product is out and shampoo with post-color shampoo and conditioner. Repeat the shampoo and conditioning process. The hair should be 80% dry before using a blow dryer. Apply heat protectants before drying to maximize shine.
After rinsing, use lukewarm water — not hot. Hot water opens the hair cuticle, which causes the color to fade faster. Finish with cold water to seal things in.
Pro Tips to Make Your Color Last Longer
Even though temporary dye is designed to wash out, there are ways to extend its life if you want to keep the look for a few extra days.
- Wash your hair less frequently. Every shampoo strips a little more color. Washing colored hair in cold to lukewarm water every three days will preserve color and enhance shine.
- Use a color-safe or sulfate-free shampoo when you do wash.
- Avoid heat styling without protection. Heat opens the cuticle and releases color molecules faster.
- Sleep on a satin pillowcase. Cotton pillowcases create friction that can dull and fade color overnight.

Common Mistakes and How to Avoid Them
Mistake 1: Skipping the patch test. This can lead to allergic reactions. Always test 24–48 hours ahead. No exceptions.
Mistake 2: Not sectioning the hair. Results in uneven patches. Spend 5 minutes sectioning — it saves you from having to redo everything.
Mistake 3: Using too much product at once. More isn’t always better. Build up gradually, especially with sprays and waxes.
Mistake 4: Expecting vivid results on dark hair without the right product. Dark hair needs specially formulated temporary dyes or a pre-lightened base to show vibrant color. Bleached hair is more porous and can absorb color more readily — always do a strand test first. Source: Necole Bitchie
Mistake 5: Washing with hot water. Hot water is the fastest way to send your color straight down the drain. Use cool or lukewarm water every time.
Is Temporary Hair Dye Safe?
Generally, yes — but with caveats.
Temporary dyes don’t penetrate the hair shaft. They simply coat the outer cuticle of the hair in pigment, which means they’re generally considered kind on your hair — a major plus for those who love experimenting with new colors but don’t want to risk their hair’s integrity.
Source: L’Oréal Paris
However, some products, like hair chalk, can be drying. Using moisturizing hair products after application is recommended to combat dryness.
If you have a sensitive scalp, check ingredient lists, do your patch test, and consider PPD-free or ammonia-free formulas.
Quick Reference: Temporary Dye Types at a Glance
| Type | Best For | Lasts | Works on Dark Hair? |
|---|---|---|---|
| Hair Chalk | Highlights, streaks | 1 shampoo | Limited |
| Color Spray | All-over color | 1 shampoo | Yes (bold shades) |
| Hair Wax / Gel | Bold color + hold | Until next wash | Yes |
| Hair Makeup (Cream) | Precise application | 1–2 washes | Yes |
| Color Depositing Conditioner | Gradual tint | 3–5 washes | Subtle only |
Final Thoughts
Knowing how to apply temporary hair dye properly is the difference between a fun, vibrant result and a patchy mess that washes out in 20 minutes.
The process isn’t complicated. It just requires a little preparation — the right product for your hair type, clean sections, proper protection for your skin, and patience during application.
Do the patch test. Section your hair. Work methodically. And rinse with cold water.
Do those five things and you’ll get results you’re actually happy with. Whether you’re going rose gold for a wedding or showing up to work on Monday with surprise blue streaks — the control is entirely in your hands.